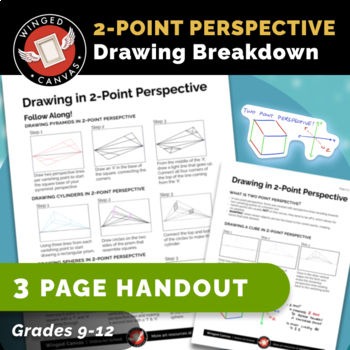
2 Point Perspective for Beginners
- Sierra Peca

- Aug 18, 2021
- 3 min read
Updated: Dec 19, 2022
A Guide for Teachers
2 Point perspective can seem tricky. We forget to notice it in real life, which is why it can start off confusing when we try to draw it. It might seem hard to understand, but with some simple steps, you can bring 2 point perspective to almost anything you draw! To help you along the way, here are Fei Lu’s step-by-step instructions on how to draw using 2 point perspective.
Not a fan of reading? No problem! We have a quick and easy video on 2 Point Perspective Drawing for Beginners on our YouTube channel.
Drawing a cube with 2 Point Perspective
2 point perspective is easiest to understand when we use a cube since it’s a simple 3D shape. The best way to draw a shape for 2 point perspective is to draw it as if it’s viewed from the corner, instead of head-on.
1. Start with a horizon line.

A horizon line marks where the ground meets the sky and goes in a horizontal direction. It indicates your line of vision - the line that is directly in front of your eyes. It doesn’t have to be placed in the centre of a page, and can actually create an interesting scene when placed higher or lower on the page.
2. Mark 2 vanishing points.

For 2 point perspective, it’s crucial that you have 2 points in your drawing. Both points need to be spread apart on the horizon line. Usually each point is placed on either side of the line. These points will be your vanishing points. This means that they will be the points that our lines lead or ‘vanish’ to.
3. Draw a line for the cube’s edge.

2 point perspective is best seen when looking at something from a corner view. To create this corner, let’s start by drawing the edge of the cube, which can be drawn as a simple line. It can be placed anywhere on the page and can be as big or small as you choose.
4. Connect the top and bottom of the edge to both vanishing points.

Use a straight edge to bring each end of the line to both vanishing points. This gives it the illusion that the lines are ‘vanishing’ as they approach the horizon.
5. Draw the sides.

Now that you’ve drawn lines that meet the vanishing points, you can draw the other sides of the cube. The sides will exist between the vanishing point lines. This is when you can decide how wide or thin your shape will be, depending on how close or separated the sides are to the original side.
6. Connect the opposite corners to the vanishing points.

Since the cube is above the horizon line, you will be able to see the bottom side of the cube. This can be drawn easily by attaching the corners to their opposite vanishing point. If the cube is below the vanishing point, you will do the same thing, but to the top of the cube, like this:

If the cube is on the horizon line (instead of above or below), this step won’t be necessary because you won’t be able to see the top and bottom of the shape when it sits on the horizon. Instead, you will stop after step 5 and it will look like this:

Bonus Step: Turning the cubes into interesting objects!

From this step, you will be able to transform your cubes into letters and objects. Experiment with turning your cube into 3-dimensional objects like a table!
Visit our YouTube Channel to learn more about perspective and watch tons of fun tutorials! If you’re a teacher, visit our art resources for teachers section on our website for helpful videos, worksheets, posters, and more!
Teacher Resources:
If you’re a teacher that’s looking for classroom content centered around perspective drawing, visit this quick and easy resource!
If you’d like more worksheets related to the elements and principles of art, check out our teachers pay teachers page, where you can get worksheets and lesson plans for your classroom! More classroom resources like this one can be found on our art resources for teachers page, where we’ve covered all of the elements of art.
Any teacher now can facilitate world-class visual art lessons — even with no art experience! Get our art courses designed for classrooms, complete with step by step video lessons, assessment tools and handouts you can use every year.
If you're an educator, you're eligible for special pricing — 50% off our regular course price! Art Projects for Your Classroom

Click that heart if you like this post! If you found this helpful, please help us share the knowledge with others.


.png)
.png)
.png)
.png)
.png)
.png)
