Top 6 Digital Art Tricks that will save you time and grief
- Jessie Chang

- Apr 21, 2021
- 5 min read
Updated: Dec 19, 2022

Digital art is the efficient and more accessible art medium of the future. But it can be kind of intimidating to those who are learning for the first time. Especially if you’re originally working traditionally, digital work can feel like a huge leap. Sometimes, it can feel like it takes even longer than traditional! But that can be because you don’t know all of the tricks and workflows of your digital art program just yet. With that being said, here are six quick tricks for digital art to save you time and grief!
Looking for something specific? Here’s a list of the shortcuts:
Colour picking
Blend and colour pick easily with the ALT key!

When it came to traditional work, most of the time you’d have to re-mix the paint you had if it ran out. But that could get tough -- sometimes the colour would be just slightly off, and it would be hard to get it exactly the way you wanted. With digital art, all it takes is a simple touch of the canvas using the eyedropper tool, and you’re good to go! However, it could get annoying needing to constantly switch between the brush and the eyedropper. Instead of switching between them constantly, however, click alt on your keyboard or program one of your tablets’ buttons to be an “alt” key. This is a quick switch from your brush to eyedropper, and once alt is released, you’ll go straight back to your brush tool. Simple!
Panning
Quickly switch back and forth between your hand tool and brush with the spacebar!

If it’s your first time working digitally, you’re probably used to moving around a webpage using the scroll bars on the side. You can still do that digitally, but it can get annoying to constantly use those! Luckily, we have the hand tool, which allows you to freely pan around the canvas. However, similar to the eyedropper tool, constantly switching back and forth between the hand and the brush can feel like a hassle. Similar to the eyedropper again, press the spacebar to quickly switch to the pan tool when needed, and once it's released, it’ll go back to whatever tool you were using previously.
Fast base colours
Never colour outside the lines again with your selection tools and alpha locks!

Colouring was and still is extremely time consuming. Especially when it came to traditional art, you’d be sitting there colouring for ages to try and get the piece as filled in as possible. Not to mention the stress of trying to keep all your colours within the lines! With digital, that’s no longer an issue! There’s an easy trick to get your colours completely filled in, and not have to worry about colouring outside the lines either.
Using the magic wand tool, select outside of your line art. Inverse the selection by clicking ctrl + shift + i, and use the paint bucket to fill in the selection on a blank layer underneath.. Deselect the area with ctrl + d, and turn on protect alpha/lock transparency for the layer -- its terminology will differ depending on your program. Now, you’ll be unable to colour outside the lines! You can even use the paint bucket set to reference the entire canvas/all layers to fill in larger areas.
Bonus tip: set your selection to expand by two pixels to get an even more seamless base!
Simple digital art shadows
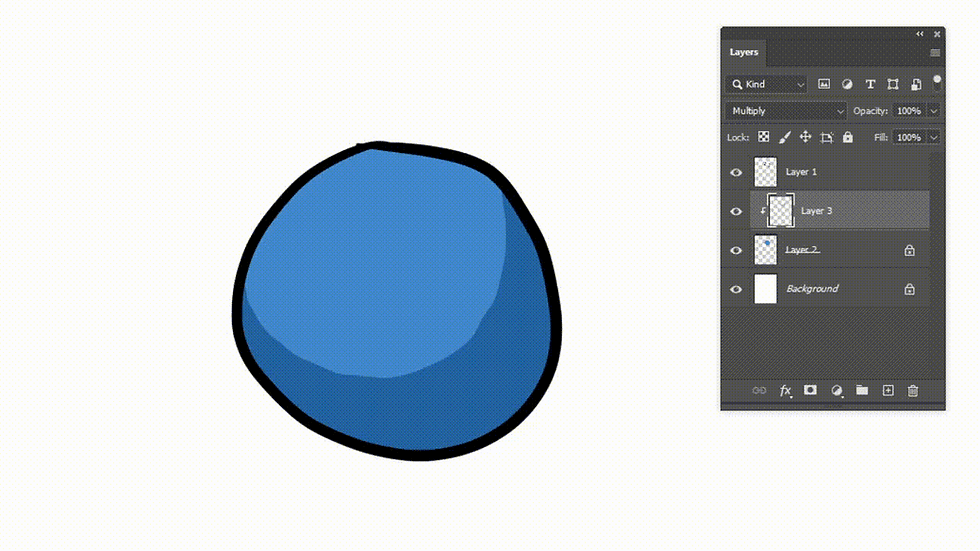
Create quick shadows by using a multiply layer!

Mixing in your shadow colours with paints or other traditional mediums can be really time consuming. Having to mix in new shadows for each colour can get really irritating, and you may still be doing that for digital art as well! But there’s a far simpler and quicker way to get simple shadows digitally.
Create a new layer above your base colours, and create a clipping mask so the new layer is clipped onto your colour layer. Using a light, dull colour, such as a pale blue or turquoise, fill in all the areas where you’d like shadows to be. Once you’re done filling them in, set the layer style to multiply, and presto! Quick and easy shadows.
Bonus tip: For more dimension, create another clipped layer of multiplied shadows. You can even adjust the initial layer to add subsurface scattering! If you want a more painted look to blend, create another clipped layer with a normal layer style, and blend from there.
Simple highlights
Create quick highlights with a screen layer!

Similar to shadows, highlights, while less cumbersome to work with, can also be a slight hassle. However, by using a very similar method to shadows, you can get simple but effective highlights!
Create a new layer above your base colours, and create a clipping mask so the new layer is clipped onto your colour layer. Using a light colour that matches the colour of your light source, fill in or blend in areas where you want reflected light to be the strongest. Once you’re done, change the layer style to screen and lower the opacity until you’re satisfied. Presto! Simple highlights!
Bonus tip: On a separate clipped layer that's layer style is normal, you can intensify or continue to blend in your highlights as much as you need!
Quick colour harmony
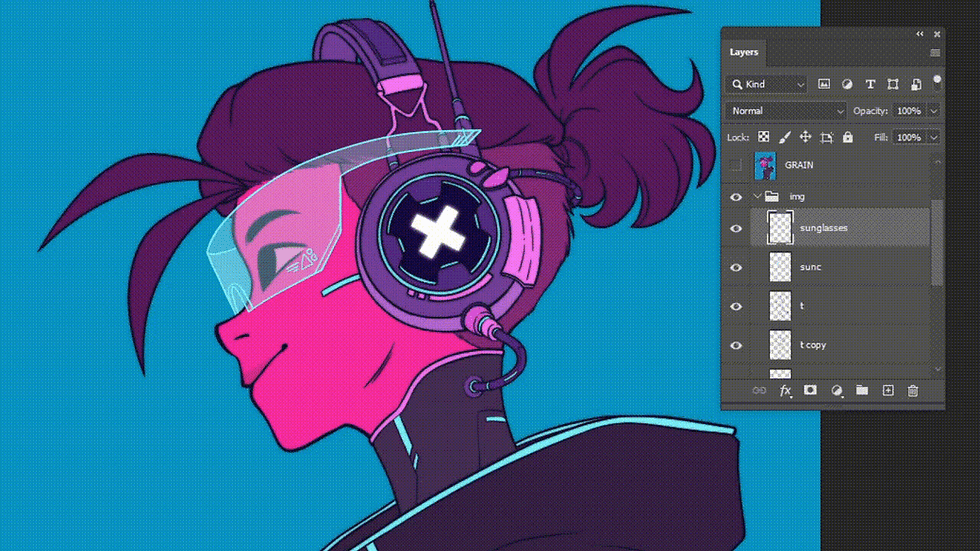
Add an overlay layer above everything else to make your colours feel harmonized!

Sometimes you’ll finish a piece, and feel like something’s missing. Maybe the colour is a little off, or it doesn’t feel quite as put together as you’d expected. An easy solution to that is an extra overlay layer!
Create a new layer above every other layer you’ve created. You can either fill it in with a solid colour, or use the gradient tool to pick multiple colours. The gradient can either correspond to the light source, or just be two of the most prevalent colours within the palette that you think may look good. Once you’re satisfied with the colour, change the layer type to overlay, and lower the opacity so the colours aren’t too intense. Turn the layer on and off again -- you’ll see that it only makes a slight difference, but it really helps make the colours feel far more harmonious!
There you have it! By using these tricks, you’ll notice how much time you’ll be able to save on your next art piece. If you liked what you read, check out our other digital art resources that we have to offer!
If you’re a complete beginner when it comes to digital art, consider checking out digital art classes to learn the fundamentals of digital artwork using the free program MediBang Paint Pro! But if you’re a little more advanced and would like to learn even more tips and tricks for digital art, take a look at our digital art camp and art mentorship, aimed at furthering that digital art experience!
Click that heart if you like this post! If you found this helpful, please help us share the knowledge with others.


.png)
.png)
.png)
.png)
.png)
.png)
